
Laboratory Cone Ball Mill: A Practical Guide for Mineral Processing and Ore Dressing Labs
Why a Laboratory Cone Ball Mill Belongs in Your Mineral Processing Lab
If you work in a mineral processing, metallurgy, or geology laboratory, you know that sample preparation is often the most time-consuming and critical step. Getting a representative, finely ground powder from an ore, rock, or artificial placer material is essential before any downstream analysis — whether it’s flotation testing, magnetic separation, chemical assay, or X-ray diffraction.
Many labs start with a jaw crusher to reduce large chunks to a few millimeters, but that’s only half the job. The next stage — fine grinding — demands a mill that can handle small batches, deliver consistent particle sizes, and tolerate both dry and wet feeds. That’s exactly where a laboratory cone ball mill shines.
Unlike conventional cylindrical ball mills, a cone ball mill has a tapered discharge end. This simple geometric difference gives it better classification performance inside the mill, meaning finer material exits more easily while coarser particles are retained for further grinding. For lab-scale work, this translates to narrower particle size distributions and more reproducible results — exactly what you need when you’re simulating a full-scale process or preparing a bench-scale test.
How a Cone Ball Mill Works: Design and Motion
Basic Structure
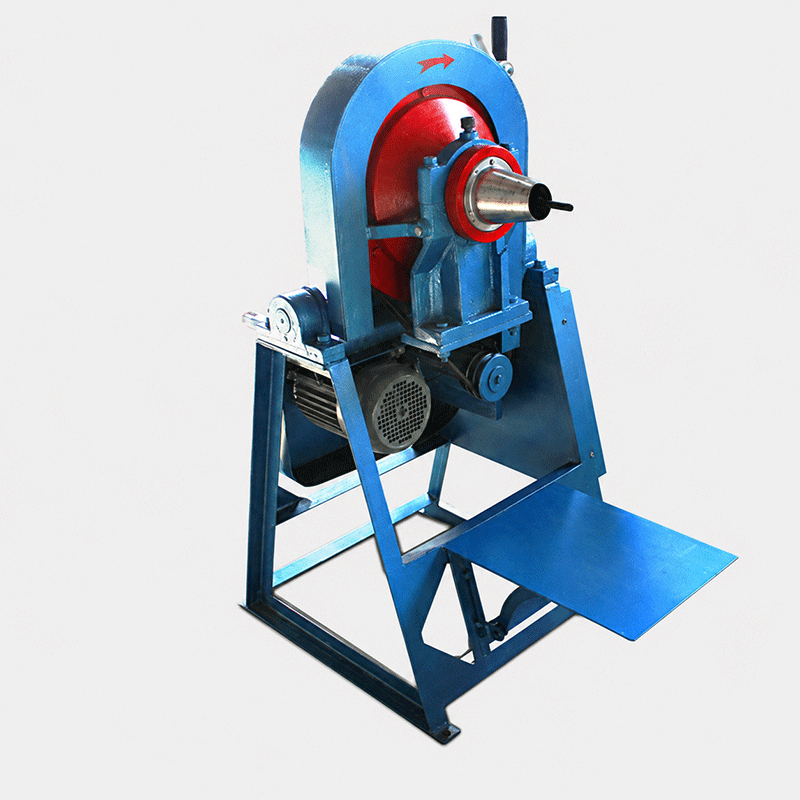
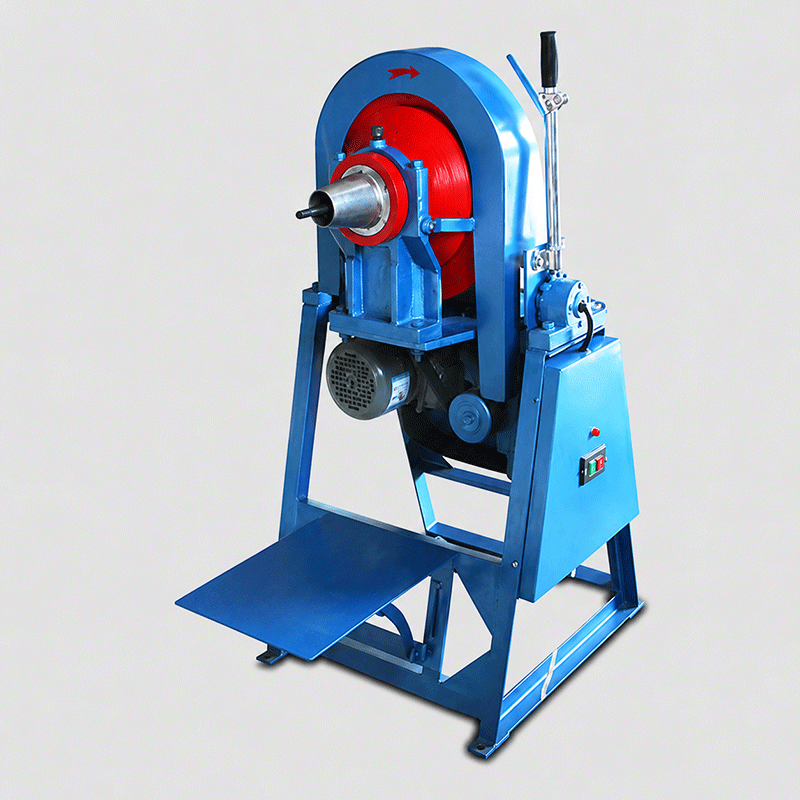
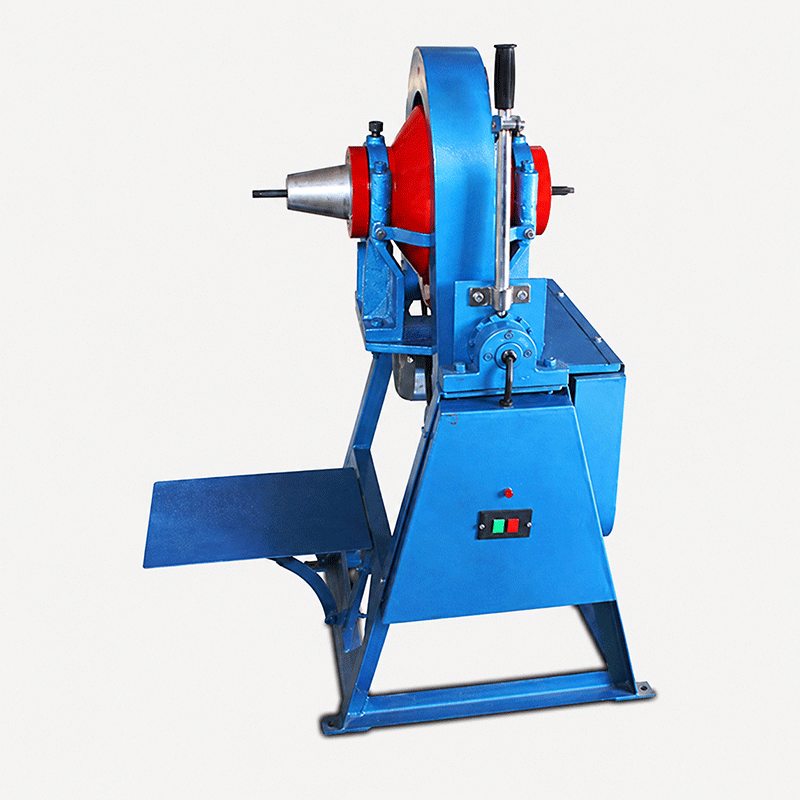
A typical laboratory cone ball mill consists of a cylindrical barrel with a conical end section. The barrel is mounted on a frame and driven by an electric motor through a reduction gear or belt drive. Inside the barrel, grinding media — usually steel balls, ceramic balls, or rods — are loaded along with the sample. The mill rotates around its horizontal axis, and the tumbling action of the media crushes and grinds the material.
Why the Cone Shape Matters
The cone at the discharge end creates a gradient in the axial direction. As the mill rotates, the balls and material move toward the cone. The tapered section allows finer particles to pass through the discharge grate more quickly, while larger particles and oversized media are pushed back toward the cylindrical section. This internal classification reduces over-grinding and improves energy efficiency — a big advantage when you’re working with small sample volumes where every gram counts.
Wet and Dry Grinding Capability
Most laboratory cone ball mills are designed for wet grinding, but many can also be used for dry grinding with appropriate adjustments. In wet grinding, the material is mixed with water to form a slurry. The slurry flows through the mill more easily, reduces dust, and often produces finer particles. Dry grinding is preferred when the sample must remain free of moisture or when subsequent processes require a dry powder.
You can switch between wet and dry modes by changing the feed method and discharge arrangement. For example, the XMQ series cone ball mill (commonly used in Chinese labs) is delivered with both wet and dry grinding capabilities. Always check your specific model’s manual, but as a general rule, if you plan to do both, make sure the mill’s seals and discharge port are compatible with slurry handling.
Common Applications: Where the Cone Ball Mill Excels
The laboratory cone ball mill is a workhorse in mineral processing laboratories. Here are some of the most typical uses:
- Ore dressing test work: Grinding ore samples to a specified particle size (e.g., 80% passing 200 mesh or 74 µm) before flotation, gravity separation, or magnetic separation tests.
- Geochemical analysis: Reducing rock, soil, and sediment samples to a fine powder for element determination by AAS, ICP-OES, or XRF.
- Artificial placer material processing: Grinding synthetic heavy mineral concentrates to liberate individual mineral grains.
- Building materials research: Fine grinding of cement clinker, slag, quartz, and other raw materials for property evaluation.
- Coal and coke preparation: Grinding coal samples for proximate analysis, calorific value testing, or ash fusion studies.
- Chemical and light industry: Small-scale grinding of pigments, catalysts, and ceramic powders.
Because the mill is compact and easy to clean, it’s ideal for laboratories that process a wide variety of materials. You can quickly switch between different ores or rocks without cross-contamination, as long as you clean the mill and grinding media thoroughly between batches.
Key Selection Factors for a Laboratory Cone Ball Mill
Choosing the right cone ball mill for your lab involves more than just picking the cheapest model. Here are the most important factors to consider:
1. Capacity and Sample Volume
Laboratory cone ball mills are typically available in small capacities, often ranging from a few hundred grams to a few kilograms per batch. For example, the XMQ-150×50 model can handle about 150–200 g of feed per batch, while larger models like the XMQ-240×90 can process up to 1–2 kg. Think about your typical sample size and how many batches you need to run per day. A mill that’s too small will slow you down; one that’s too large may waste sample and media.
2. Grinding Media Selection
The type and size of grinding media directly affect grinding efficiency, final particle size, and contamination. Common options include:
- Steel balls: Durable and heavy, good for hard ores. But they can introduce iron contamination, which may interfere with certain analyses (e.g., iron ore or trace element studies).
- Ceramic balls (alumina, zirconia): Lower contamination, suitable for non-metallic minerals and high-purity applications.
- Agate balls: Very low contamination, ideal for trace element analysis, but softer and more expensive.
- Stainless steel balls: A compromise between hardness and contamination control.
For most mineral processing labs, steel balls are the default choice. If you need to avoid iron contamination, switch to ceramic or agate media. The ball size should match your feed particle size: for a feed of 1–3 mm, balls of 10–20 mm diameter are common; for finer feeds, 5–10 mm balls work better.
3. Rotational Speed
The mill’s rotational speed determines the motion of the grinding media. Too slow, and the balls just slide; too fast, and they centrifuge against the wall. The critical speed (the speed at which centrifugal force equals gravity) depends on the mill diameter. For a laboratory cone ball mill with a diameter of about 200–300 mm, the typical operating speed is around 50–80% of critical speed, which often translates to 60–100 rpm. Many lab mills come with a fixed speed, but some allow speed adjustment. If you’ll be grinding different materials with varying hardness, a variable speed drive gives you more flexibility.
4. Discharge Method
Most lab cone ball mills use a grate discharge: the ground material passes through slots or holes at the cone end. The gap size of the grate determines the maximum particle size in the product. For wet grinding, the slurry overflows through the discharge spout. For dry grinding, you may need to stop the mill and manually empty the contents. Some models offer both options, so ask about the discharge configuration before purchasing.
5. Construction Material and Durability
The mill body is usually made of steel or cast iron, with a wear-resistant lining (e.g., manganese steel, ceramic, or polyurethane). The lining protects the shell and reduces contamination. For abrasive ores like quartz or granite, a hard lining is essential to extend service life. The drive components (motor, gears, bearings) should be robust enough for daily use. Check the motor power: a 0.5–1.5 kW motor is typical for small lab mills.
6. Ease of Cleaning and Maintenance
In a busy lab, you’ll be grinding multiple samples each day. A mill that’s easy to disassemble and clean saves hours. Look for a design with a removable cover, accessible discharge port, and smooth interior surfaces. Some models allow you to lift the mill body off the frame for thorough cleaning. Also consider the availability of spare parts like grinding media, liners, and seals.
Practical Tips for Getting the Best Results
- Ball-to-powder ratio: A common starting point is a ratio of about 5:1 to 10:1 by weight (balls to sample). For hard materials, use a higher ratio; for soft materials, a lower ratio may suffice.
- Grinding time: Start with a short cycle (e.g., 5–10 minutes) and check the particle size. Adjust as needed. Over-grinding can cause excessive wear and contamination.
- Wet vs. dry: If your downstream process (e.g., flotation) uses a slurry, wet grinding is more efficient. For dry grinding, ensure the material is completely dry to avoid clogging.
- Sample preparation: Crush the feed to <3 mm before placing it in the cone ball mill. This reduces grinding time and protects the mill from large particles.
- Clean between batches: Use a brush, compressed air, or a small amount of quartz sand to clean the mill and media. Cross-contamination is a common source of error in assay labs.
Comparing the Cone Ball Mill with Other Lab Mills
You might wonder: Why choose a cone ball mill over a planetary ball mill, a rod mill, or a disc mill? Here’s a quick comparison:
- vs. Planetary ball mill: Planetary mills produce extremely fine particles (<1 µm) and are great for nanomaterials, but they are more expensive and have lower capacity. Cone ball mills are better for routine mineral processing test work where you need 50–200 µm products.
- vs. Rod mill: Rod mills use steel rods instead of balls, which produce a more elongated particle shape. Cone ball mills give a more equiaxed particle shape, which is often preferred for flotation and gravity separation.
- vs. Disc mill: Disc mills grind by shearing between two grooved discs. They are fast and simple but can cause higher contamination and produce a wider particle size distribution. Cone ball mills offer more uniform grinding and lower contamination when using appropriate media.
For most mineral processing laboratories, the cone ball mill is the most cost-effective and versatile choice for routine fine grinding. It’s a proven design that has been used for decades in labs around the world.
Getting the Right Configuration for Your Lab
When you’re ready to purchase a laboratory cone ball mill, you’ll need to provide some basic information to ensure the supplier can recommend the correct model. Key details include:
- Type of material(s) you will grind (e.g., copper ore, iron ore, quartz, coal)
- Expected feed particle size
- Target particle size (e.g., 80% passing 200 mesh, or d50 of 75 µm)
- Sample quantity per batch
- Wet or dry grinding
- Preferred grinding media material (steel, ceramic, agate)
- Local voltage and frequency (e.g., 220V/50Hz, 110V/60Hz)
- Any special requirements (e.g., explosion-proof, stainless steel contact parts)
With this information, a technical team can help you select the appropriate mill capacity, lining material, and discharge configuration. Remember that the final grinding result depends on many factors, so it’s always a good idea to run a test batch with your own material if possible.
If you’re also interested in other lab grinding equipment — such as a three roll mill for paste or ink applications, or a lab air jet mill for ultra-fine dry powders — your needs can often be met by the same supplier, simplifying procurement and after-sales support.
Final Thoughts
A laboratory cone ball mill is a reliable, efficient, and practical tool for any lab that works with ores, minerals, and rocks. Its tapered design provides internal classification, improving grinding efficiency and product consistency. By carefully selecting the right capacity, grinding media, and operating parameters, you can achieve reproducible results that translate directly to pilot or production-scale processes.
Whether you’re setting up a new mineral processing lab or upgrading an existing one, the cone ball mill deserves a close look. It’s not the newest or flashiest technology, but it has proven its value in thousands of labs worldwide — and it will likely continue to do so for years to come.