
Desktop Air Blower Dryer for Sample Drying
Why Moisture Control Is a Critical Step in Laboratory Sample Preparation
Moisture is one of the most common sources of variability in laboratory sample preparation. A powder that looks dry may still contain adsorbed water or surface moisture that affects grinding behavior, sieving efficiency, blending uniformity, and analytical results. In materials research, moisture can change particle interactions, cause agglomeration, promote corrosion in metal powders, or alter the thermal profile during sintering. In geoscience and environmental testing, residual moisture can bias mass measurements and complicate the interpretation of particle size distribution data.
Many laboratories rely on ambient air drying or a conventional oven when preparing samples. Ambient drying is slow and depends on room conditions, while static oven drying can be uneven when samples are loaded in thick layers. Forced-air drying addresses these issues by moving heated air across the sample surface, carrying moisture away more efficiently. A desktop air blower dryer is a compact example of this approach. It is designed for benchtop use, making it suitable for laboratories that need a dedicated drying step without committing to a large oven or complex drying system.
The goal of this article is to explain how a desktop air blower dryer works, what factors influence drying performance, and how to evaluate whether it fits a specific sample preparation workflow. The discussion focuses on practical selection and operation rather than a single set of specifications, because drying behavior depends heavily on material properties, sample mass, and process conditions.
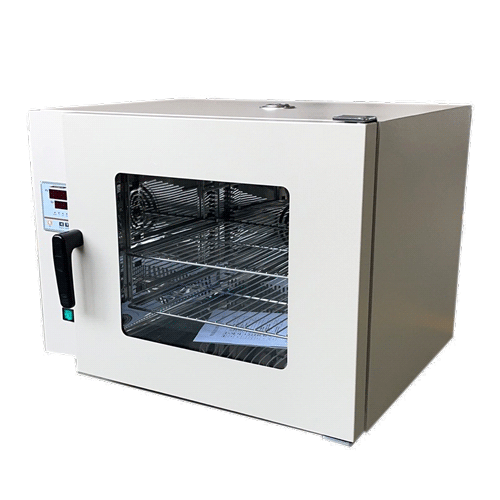
How a Desktop Air Blower Dryer Works
A desktop air blower dryer uses forced convection to remove moisture from samples. The basic principle is straightforward: a blower moves air through a heating element, and the heated air passes over the sample. As air contacts the wet material, heat transfers to the sample and water evaporates into the air stream. The moving air then carries the moisture out of the drying chamber. This continuous exchange prevents the air near the sample from becoming saturated, which is a common limitation of static drying.
The main functional sections of a typical desktop air blower dryer include:
- Air blower: generates airflow across the sample. The blower determines the air velocity and how quickly moisture-laden air is replaced with drier air.
- Heating element: raises the air temperature to a setpoint. The heating capacity and control method affect how quickly the dryer reaches the desired temperature and how stable that temperature remains.
- Drying chamber or tray area: holds the sample in a defined space. The chamber geometry influences airflow distribution and whether all parts of the sample receive similar drying conditions.
- Controls and safety devices: manage temperature, time, and sometimes airflow. Over-temperature protection, thermal fuses, and insulated housings are common safety features.
- Housing and insulation: keep heat inside the unit and protect the operator. A desktop format usually prioritizes a small footprint and easy access.
Because the dryer is compact, it is often used for small batches, research samples, and quality control specimens. The actual drying rate depends on the temperature setpoint, airflow rate, sample mass, exposed surface area, and material properties. For this reason, the same dryer can behave differently when handling a coarse mineral powder, a fine ceramic slurry, or a moisture-sensitive pharmaceutical intermediate.
In a forced-convection dryer, heat and mass transfer occur simultaneously. Heat moves from the air to the sample, while moisture moves from the sample to the air. If the airflow is too low, the air becomes humid and drying slows. If the airflow is too high, fine powders may be entrained or blown out of the tray. Temperature also plays a dual role: higher temperatures increase the driving force for evaporation, but they can also cause oxidation, degradation, or phase changes in sensitive materials. The operating window is therefore material-specific.
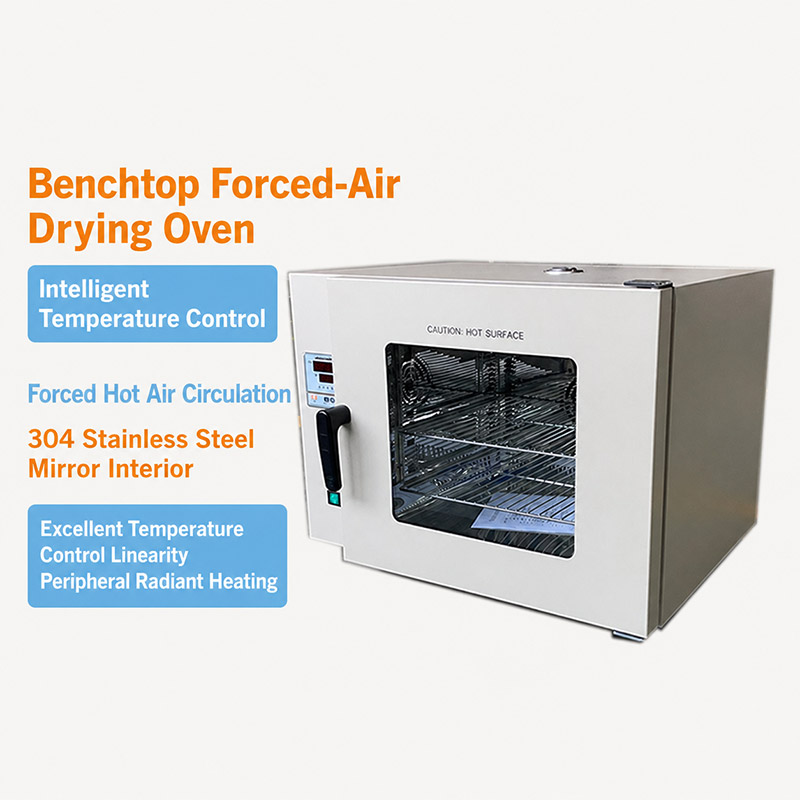
Key Differences Between Forced-Air Drying and Static Oven Drying
Understanding the difference between forced-air drying and static drying helps explain why a desktop air blower dryer is useful in certain laboratory workflows. In a static oven, the sample is placed in a chamber where air movement is limited. Moisture evaporates from the sample, but the air near the surface can become saturated. Evaporation then slows because the concentration gradient between the sample surface and the surrounding air decreases. In a forced-air dryer, the blower continuously replaces humid air with drier air, maintaining a larger driving force for evaporation.
The table below summarizes general differences rather than absolute performance claims. Actual results depend on the dryer design, sample type, and operating conditions.
| Factor | Forced-air desktop dryer | Static oven |
|---|---|---|
| Air movement | Continuous airflow across the sample | Limited natural convection |
| Drying uniformity | Often improved when airflow is well distributed | Can vary with tray position and loading |
| Drying speed | Typically faster for surface moisture | Often slower, especially in thick layers |
| Risk of sample disturbance | Higher for very fine or low-density powders | Lower, because there is less air velocity |
| Equipment footprint | Compact benchtop designs are common | Can be large, depending on capacity |
For laboratories that process small samples, a compact forced-air unit can shorten the time between wet processing and downstream analysis. However, it is not automatically the right choice for every material. Very fine powders, for example, may require lower airflow or a covered tray to prevent losses. Temperature-sensitive materials may need a lower setpoint and longer drying time. The selection process should therefore consider both the equipment and the sample.
Factors That Affect Drying Performance in a Desktop Air Blower Dryer
Drying is a process with several interacting variables. Changing one factor often affects another. The following subsections explain the main variables that laboratory staff should evaluate when using or selecting a desktop air blower dryer.
Air Temperature
Temperature is one of the strongest influences on drying rate. Warmer air holds more moisture and increases the rate of evaporation from the sample. However, the maximum safe temperature depends on the material. Organic compounds may degrade, oxidize, or melt. Hydrated minerals may lose structural water. Metal powders may oxidize more rapidly at elevated temperatures. Biological samples may lose activity. For these reasons, the temperature setpoint should be chosen based on the material's thermal stability, not simply the maximum temperature the dryer can reach.
A practical approach is to start with a conservative temperature and verify the sample after drying. If the material tolerates higher temperatures, the setpoint can be increased gradually while monitoring for color changes, caking, or weight loss beyond the expected moisture content. Documentation of the chosen temperature and time helps ensure reproducibility.
Airflow Rate and Distribution
Airflow rate determines how quickly moisture is removed from the chamber. Higher airflow generally increases drying speed, but it also increases the risk of blowing fine particles out of the tray. Airflow distribution matters as much as total flow. If the air takes a shortcut through the chamber, some areas of the sample may dry more slowly. Baffles, tray placement, and chamber design influence how evenly the air moves across the sample.
When working with light powders, it may be necessary to reduce airflow, use a deeper tray, or cover the sample with a breathable material. When working with dense granules or larger particles, higher airflow can be used without significant sample loss. The optimal setting is usually found by testing a representative sample.
Sample Loading and Layer Thickness
The way a sample is loaded into the dryer has a major effect on drying time and uniformity. A thin, evenly spread layer exposes more surface area and allows moisture to escape quickly. A thick pile creates a diffusion barrier: moisture from the interior must travel to the surface before it can evaporate. This can lead to a dry crust on top while the center remains wet.
For consistent results, spread the sample as evenly as practical. Avoid overloading the tray, even if the dryer has enough physical space. If the sample is too large for a single layer, consider drying it in smaller batches or stirring it periodically if the procedure allows. The goal is to balance throughput with uniform drying.
Particle Size, Porosity, and Surface Area
Particle size and porosity affect how easily moisture moves through a material. Coarse, non-porous particles usually release surface moisture quickly because the moisture is readily available at the surface. Fine powders have a high specific surface area and may hold moisture more strongly through adsorption and capillary forces. Porous materials can trap moisture inside pores, requiring longer drying times or higher temperatures to remove it.
Hygroscopic materials are a special case. They can absorb moisture from the air after drying, especially if they are cooled in a humid environment. For such materials, it may be necessary to cool the sample in a desiccator or transfer it immediately to a sealed container.
Ambient Humidity and Laboratory Conditions
The moisture content of the incoming air affects drying performance. In a humid laboratory, the air supplied to the dryer already contains water vapor, so its capacity to pick up additional moisture is reduced. In a dry environment, the same dryer may perform differently. Seasonal changes can therefore introduce variability if the drying process is not controlled.
If reproducibility is critical, consider documenting the ambient conditions or using a dryer in a controlled environment. In some cases, pre-drying the incoming air or using a dry air supply can improve consistency, but this adds complexity and should be justified by the application.
Material Thermal Sensitivity and Chemical Compatibility
Not all materials can be dried with hot air. Solvent-wet samples may release flammable vapors, which require explosion-proof equipment and appropriate ventilation. Materials that oxidize easily may need an inert atmosphere or vacuum drying instead. Biological samples may require low-temperature drying. The desktop air blower dryer is most appropriate for aqueous or moisture-containing samples that are stable at the chosen temperature and do not release hazardous vapors.
Chemical compatibility also applies to the wetted parts of the dryer. Trays, chamber liners, and seals should be compatible with the sample and any residual solvents. If the sample is acidic, alkaline, or corrosive, check the material of construction before use.
Table: Drying Factors and Practical Adjustments
| Factor | Effect on drying | Practical adjustment |
|---|---|---|
| Higher temperature | Faster evaporation, but risk of degradation | Use the lowest temperature that achieves acceptable drying time |
| Higher airflow | Faster moisture removal, but possible sample loss | Reduce airflow for fine powders; increase for dense granules |
| Thicker sample layer | Slower and less uniform drying | Spread sample thinly; split into smaller batches |
| High ambient humidity | Slower drying and possible moisture rebound | Document conditions; use desiccator for cooling and storage |
| Fine or hygroscopic powder | Strong moisture retention; risk of caking | Use lower airflow, gentle temperature, and sealed storage |
Selecting a Desktop Air Blower Dryer for a Laboratory Workflow
Choosing a dryer is not only about finding a unit that reaches a certain temperature. The right choice depends on the samples, the required throughput, the level of process control, and the available bench space. The following criteria can help structure the evaluation.
Capacity and Sample Format
Start by defining the typical sample mass and the number of samples processed per day. A desktop dryer is generally intended for small to moderate sample sizes, but the actual working capacity depends on the tray configuration and chamber volume. Consider whether the samples are powders, granules, pastes, or solid pieces. Powders may require shallow trays, while granules may be placed in deeper beds. If the laboratory handles multiple sample types, look for a dryer with adjustable trays or modular sample holders.
Temperature Control and Range
The required temperature range depends on the materials. A dryer with precise temperature control is beneficial when working with sensitive samples. Look for clear setpoint adjustment, stable temperature holding, and over-temperature protection. If the process requires documented temperature profiles, consider whether the dryer allows data logging or external verification. Avoid choosing a dryer solely because it offers a very high maximum temperature; the useful range is determined by the sample, not the heater.
Airflow Control and Uniformity
Adjustable airflow is useful because different samples require different conditions. A gentle airflow may be needed for fine powders, while a stronger airflow can shorten drying time for dense materials. Chamber design also matters. Look for a layout that distributes air across the entire tray rather than directing it at a single spot. If possible, test the dryer with a representative sample and check for uneven drying across the tray.
Safety Features
Safety should be evaluated before performance. Common features include over-temperature protection, thermal insulation, grounded electrical components, and compatible materials for trays and seals. If the samples contain flammable solvents, a standard hot-air dryer may not be suitable. In that case, explosion-proof equipment, solvent recovery, or vacuum drying may be required. Never use a dryer outside its intended atmosphere and electrical classification.
Contamination Control and Cleanability
Cross-contamination is a concern when the same dryer is used for different materials. Smooth surfaces, removable trays, and easy-to-clean chambers reduce the risk. For trace analysis, dedicated trays or liners may be necessary. Check whether the materials of construction release particles or react with the sample. If the dryer is used for food, pharmaceutical, or biological samples, cleaning validation may be required.
Footprint, Noise, and Utility Requirements
A desktop dryer should fit the available bench space and the laboratory's power supply. Noise from the blower can be a consideration in shared laboratories. Utility requirements such as voltage, frequency, and ventilation should be confirmed before purchase. If the dryer requires an exhaust connection, plan the installation accordingly.
Questions to Ask Before Buying a Desktop Air Blower Dryer
- What is the typical sample mass and layer thickness?
- What temperature range is safe for the material?
- Is airflow adjustable, and can it be reduced for fine powders?
- Does the chamber design promote uniform drying?
- What safety protections are included?
- How easy is the unit to clean and maintain?
- Does the dryer fit the available bench space and power supply?
- Is documentation available for temperature verification and routine maintenance?
For laboratories that need a compact drying step, the desktop air blower dryer from TENCAN is designed for benchtop sample preparation. It can be evaluated alongside other drying methods based on the criteria above.
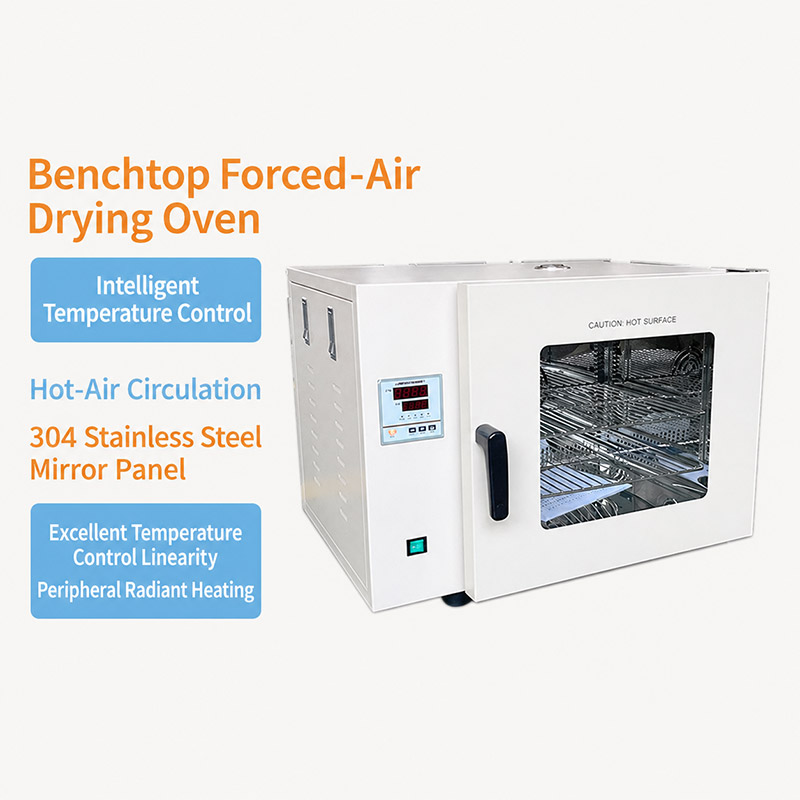
Integrating a Desktop Air Blower Dryer into Sample Preparation Workflows
A dryer is rarely used in isolation. It usually sits between a wet process and a dry process. Understanding where it fits helps determine whether it will solve the real bottleneck.
Drying After Wet Milling or Grinding
Wet milling is common in laboratories because it controls dust, reduces heat generation, and can achieve fine particle sizes. After milling, the slurry must be dried before dry sieving, dry blending, or analysis that requires free-flowing powder. A desktop air blower dryer can be used to remove moisture from the milled material. The drying step should be gentle enough to avoid agglomeration and strong enough to prevent long delays. If the milled powder is very fine, reduce airflow or use a tray liner to minimize losses.
Drying Before Sieving and Particle Size Analysis
Moisture causes particles to stick together, which can block sieve openings and distort particle size distribution results. Drying the sample before sieving improves flowability and reproducibility. However, the drying method itself can cause agglomeration if the temperature is too high or if soluble salts form bridges between particles. For samples containing soluble components, lower-temperature drying and gentle handling are recommended. After drying, cool the sample in a desiccator if it is hygroscopic.
Drying Before Sintering or Thermal Processing
In ceramic, metallurgy, and battery research, residual moisture can affect compaction, green body density, and sintering behavior. Drying a powder before pressing or sintering reduces the risk of steam generation, cracks, and inconsistent shrinkage. A desktop air blower dryer can be used for small batches, while larger production volumes may require larger forced-air ovens or vacuum dryers. The choice depends on scale and the sensitivity of the material.
Drying of Geological, Environmental, and Agricultural Samples
Soil, sediment, plant tissue, and agricultural samples often require drying before grinding and analysis. These materials can be heterogeneous and may contain stones, roots, or organic matter. Pre-treatment such as air drying or low-temperature drying is common. A desktop air blower dryer can accelerate the process compared with ambient drying, but the temperature must be low enough to avoid altering organic matter or volatile compounds. For samples intended for volatile analysis, freeze-drying or vacuum drying may be more appropriate.
Workflow Example
A typical workflow for a wet-milled ceramic powder might look like this:
- Wet mill the powder to the target particle size.
- Transfer the slurry to a drying tray and spread it evenly.
- Dry the sample in a desktop air blower dryer at a material-appropriate temperature.
- Cool the dried powder in a desiccator if it is hygroscopic.
- Dry sieve or analyze the powder for particle size distribution.
- Store the dried sample in a sealed container.
The exact drying time and temperature should be determined by testing. A trial run with a small representative sample can reveal whether the chosen settings cause caking, oxidation, or sample loss.
Operating Best Practices for Desktop Air Blower Dryers
Good operating practice improves reproducibility and extends equipment life. The following recommendations are general and should be adapted to the specific dryer and sample.
Preparation Before Drying
- Read the product manual and confirm the maximum allowable temperature and airflow settings.
- Check that the tray and chamber are clean and dry.
- Verify that the sample is compatible with the materials of construction.
- Weigh the sample before drying if moisture content will be calculated.
- Spread the sample in a thin, even layer.
During Drying
- Start with a conservative temperature and increase only if the material tolerates it.
- Monitor the sample periodically to check for color changes, caking, or loss of fines.
- Do not open the chamber frequently if it causes a large temperature drop; use the control system and observe through a window if available.
- If the sample is prone to crusting, consider stirring at intervals if the procedure allows.
After Drying
- Allow the sample to cool before weighing or transferring, unless the process specifies otherwise.
- Cool hygroscopic samples in a desiccator.
- Store dried samples in sealed containers to prevent moisture pickup.
- Clean the dryer according to the manual to avoid cross-contamination.
Maintenance and Calibration
Regular maintenance keeps the dryer working as intended. Check the blower for dust accumulation, inspect the heater and wiring for signs of wear, and verify that seals and insulation are intact. If temperature accuracy is critical, calibrate the temperature control periodically using a reference thermometer. Keep maintenance records so that any drift can be detected. Cleaning frequency depends on the materials processed; fine powders and sticky samples may require more frequent cleaning.
Common Drying Problems and Troubleshooting
Even a well-designed dryer can produce unsatisfactory results if the process is not matched to the sample. The table below lists common problems and possible causes. Use it as a starting point for investigation, not as a substitute for testing.
| Problem | Possible causes | Suggested actions |
|---|---|---|
| Sample still wet after expected time | Layer too thick; airflow too low; temperature too low; high ambient humidity | Spread sample thinner; increase airflow or temperature if safe; check ambient conditions |
| Dry crust on top, wet center | Thick loading; high surface temperature; insufficient air movement | Reduce layer thickness; lower temperature; improve airflow distribution |
| Fine powder blown out of tray | Airflow too high; tray too shallow; sample too light | Reduce airflow; use a deeper tray or liner; cover with breathable material if appropriate |
| Sample discoloration or degradation | Temperature too high; oxidation; material sensitivity | Lower temperature; shorten drying time; consider vacuum or inert-atmosphere drying |
| Sample reabsorbs moisture after drying | Hygroscopic material; cooling in humid air; open storage | Cool in desiccator; store in sealed container; reduce exposure time |
| Uneven drying across the tray | Poor airflow distribution; uneven loading; tray position | Rearrange tray; rotate sample if allowed; check chamber design |
| Contamination from previous sample | Incomplete cleaning; worn seals or trays | Clean thoroughly; replace damaged parts; use dedicated trays for trace work |
If a problem persists, it is often useful to run a drying curve: measure sample mass at intervals under controlled conditions. This shows the drying rate and helps identify the point at which moisture removal slows. The data can be used to set a repeatable drying time and to compare different settings.
Frequently Asked Questions About Desktop Air Blower Dryers
Can a desktop air blower dryer handle temperature-sensitive materials?
It depends on the material and the available temperature range. Many units allow low setpoints, but the actual capability varies by model. For very sensitive materials, vacuum drying or freeze-drying may be more appropriate. Always verify with a small trial before processing a valuable sample.
Is a desktop air blower dryer suitable for solvent-wet samples?
Standard hot-air dryers are generally not suitable for flammable solvents unless they are specifically designed and rated for that purpose. Solvent vapors can create fire or explosion hazards. Use explosion-proof equipment, adequate ventilation, and solvent recovery systems where required.
How do I choose the right tray and sample loading?
Select a tray that is compatible with the sample and fits the dryer chamber. Load the sample in a thin, even layer. If the sample is fine or lightweight, reduce airflow or use a liner to prevent loss. The optimal loading is determined by testing.
Can I use the dryer for multiple sample types?
Yes, but cross-contamination must be managed. Clean the chamber and trays between samples, and consider dedicated trays for trace analysis. If the materials react with each other or with the dryer surfaces, separate equipment may be needed.
How often should the dryer be calibrated and maintained?
Follow the manufacturer's recommendations. For critical applications, calibrate the temperature control periodically and keep records. Inspect the blower, heater, seals, and electrical components regularly. Cleaning frequency depends on usage and sample type.
Making a Practical Decision for Your Laboratory
A desktop air blower dryer is a focused tool for a common laboratory problem: removing moisture from small samples in a controlled, repeatable way. It is not a universal replacement for every drying method. Vacuum dryers, freeze dryers, and large forced-air ovens each have their place. The decision should be based on the material, the required throughput, the acceptable temperature range, and the level of process control needed.
When evaluating a specific unit, look beyond the product name. Consider how the airflow is distributed, how the temperature is controlled, how easy the chamber is to clean, and what safety features are included. Ask for documentation and, if possible, test the dryer with a representative sample. A short trial can reveal more than a specification sheet, especially for fine powders, hygroscopic materials, or samples that are sensitive to heat.
For laboratories that need a compact benchtop solution, the desktop air blower dryer from Changsha Tianchuang Powder Technology Co., Ltd (TENCAN) is designed for sample preparation workflows where space is limited and consistent drying is required. It can be used alongside milling, sieving, and analytical equipment to create a more reliable sample preparation chain. As with any drying process, the final settings should be validated for the specific material and documented for future reference.
Before adopting a new drying procedure, run a small-scale test and compare the results with your existing method. Check for changes in particle size, moisture content, flowability, and analytical response. Once the process is validated, record the temperature, airflow, loading, and drying time so that other operators can reproduce the results. This simple step turns a general-purpose dryer into a reliable part of the laboratory workflow.